
(Post Updated 27th May 2026)
Everyone needs a good go to vanilla cake recipe and today I wanted to share mine with you. This is probably the recipe I use most often and it actually features in a lot of my tutorial videos.
Reasons you’ll love this cake
- Versatile: This recipe is perfect for simple round cakes.
- Super Easy: It requires only 5 ingredients for the main cake.
- Great for Carving: It’s soft and fluffy but holds its shape perfectly for 3D cakes.
- Cupcake Friendly: It’s perfect for using in smaller quantities for cupcakes, too!
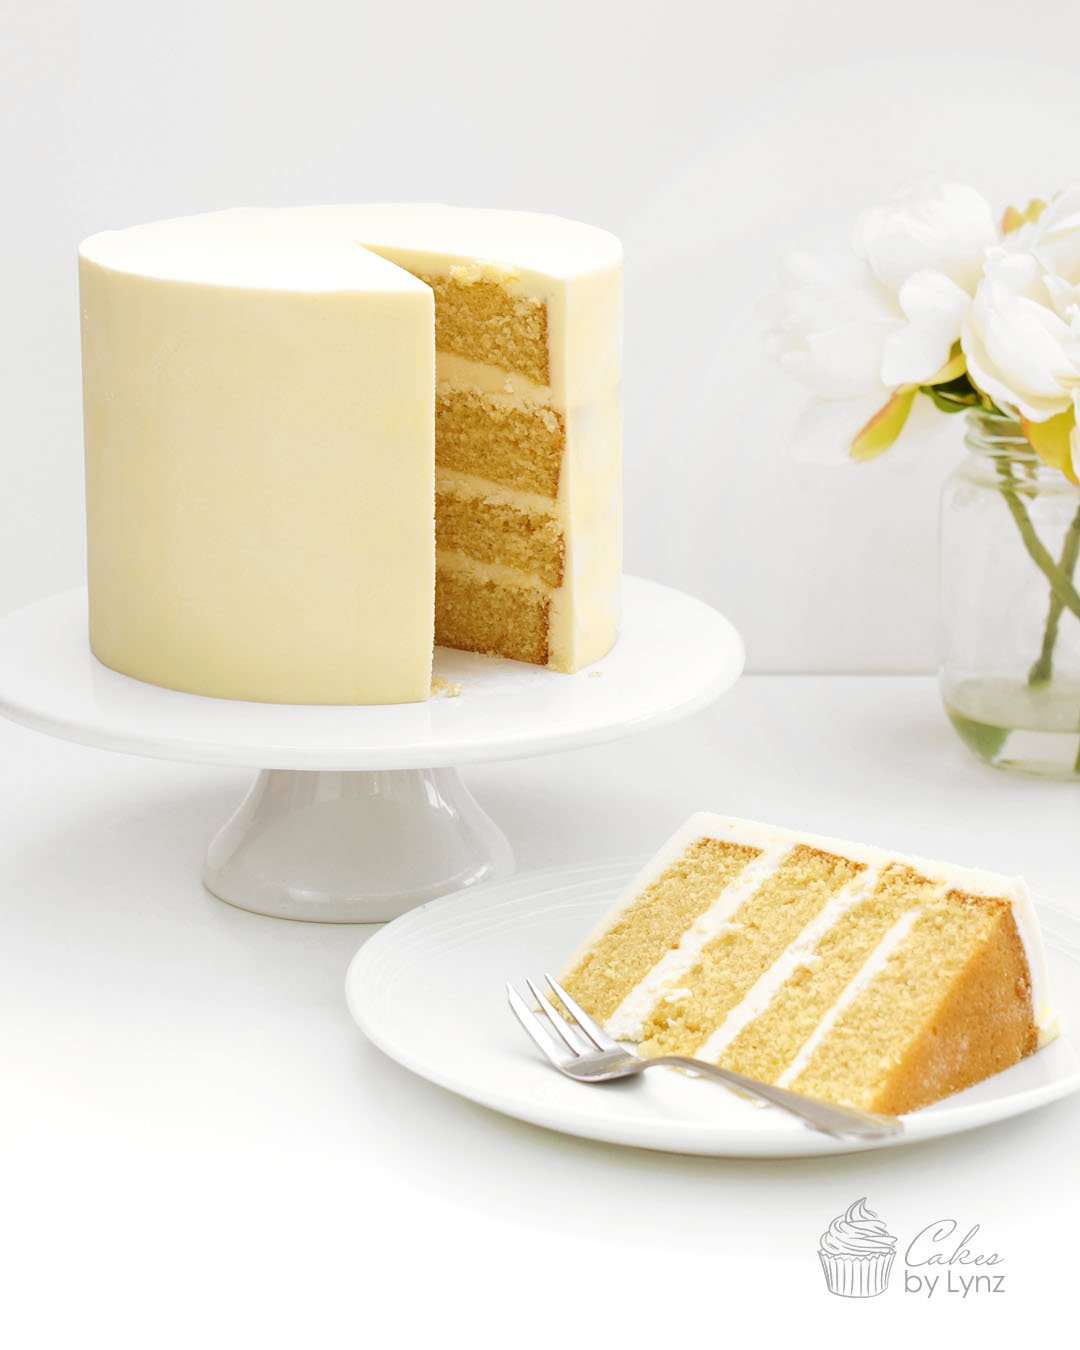
If you’ve seen my vanilla cupcake recipe it’s actually very similar but the recipe below will make 2x 6 inch round cakes which when divided up gives you 4 layers each 1 inch in height. You can then alter the recipe if you are making smaller or larger cakes. To find out how to alter your ingredients you can find my cake conversion chart here . This will show you how to convert any recipe for any size cake tin.
Step by step vanilla cake video tutorial
Click the video below to see how I make my vanilla cake; from the ingredients you’ll need, how to tell when your mixture is ready, adding your mixture into the cake tins and how to bake it for the perfect vanilla cake. If you’d prefer you can also find the full recipe at the bottom of this post.
How to make the perfect vanilla cake
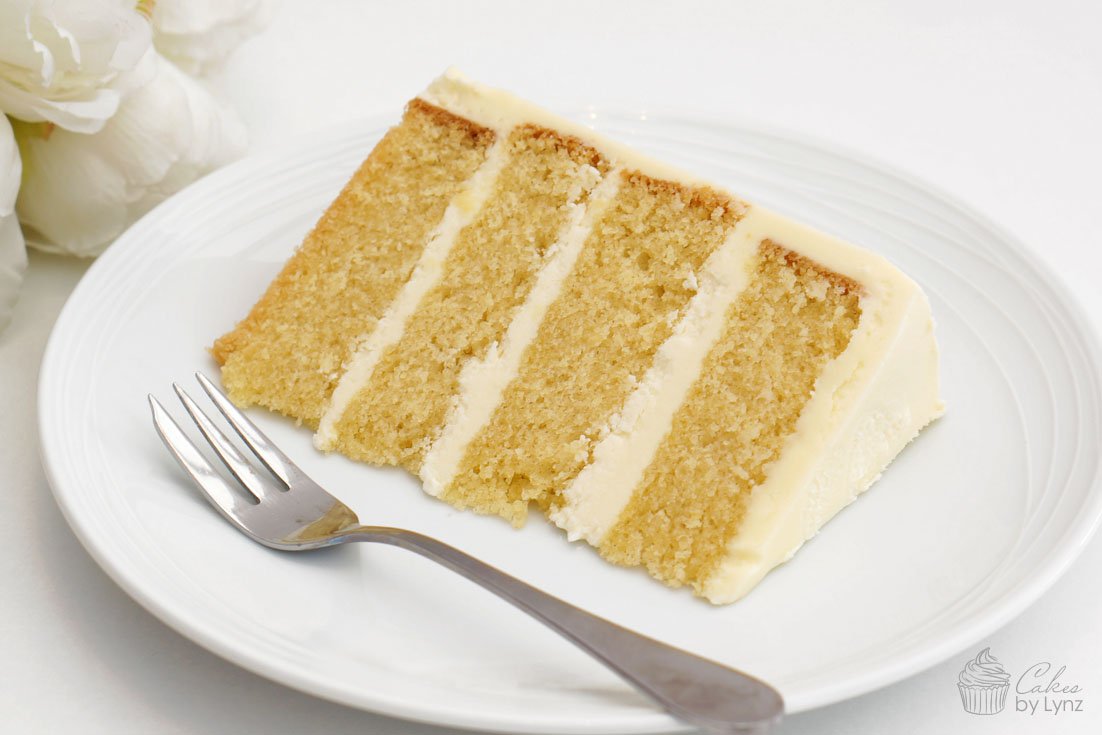
This cake is so easy to make and this recipe will give you two 6 inch round cakes which when divided up gives you 4 layers each 1 inch in height.
- Firstly you’ll want to prepare your cake tin. I like to use a paper towel to cover them in butter or baking spread and coat this in a thin layer of flour to stop the cakes from sticking.
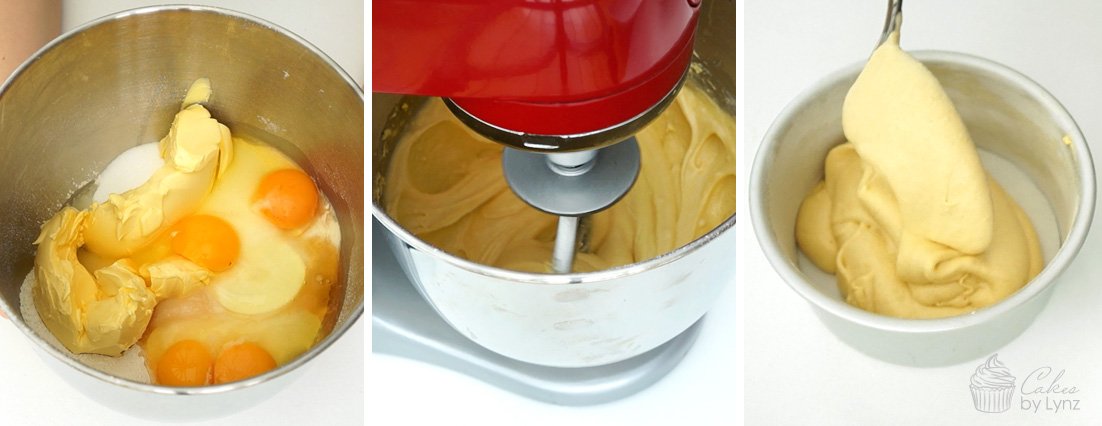
- Then add all of your ingredients (flour, sugar, eggs, butter or baking spread, vanilla extract) into your mixing bowl at the same time, making sure to sift your flour so there are no lumps.
- Using an electric hand mixer or a larger stand mixer start to mix up your ingredients on a medium speed until they are fully combined. After around 30 seconds you are left with a smooth, silky cake mixture.
- Divide your mixture between your 2 cake tins and bake your cakes on the middle shelf of a preheated oven at 180 degrees Celsius for around 45 minutes. One thing to remember is that everyone’s ovens bake slightly differently, so keep an eye on them. You want them just golden brown on the top and if you poke a cocktail stick into the center you want this to come out clean.
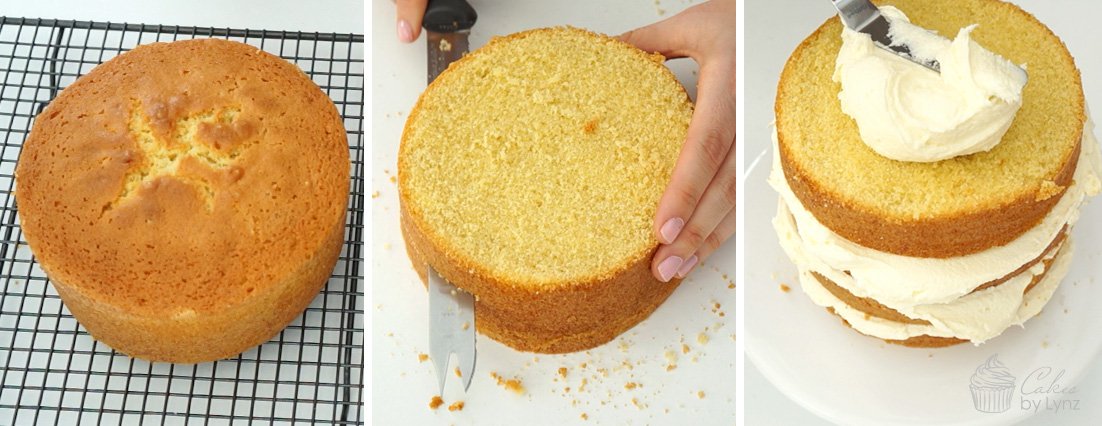
- Your cakes can then be left to cool. I like to wrap my cakes in cling film after they have cooled and pop these into the fridge to chill. This makes them a lot easier to cut and carve into layers. They will return to being soft and fluffy when they are back to room temperature.
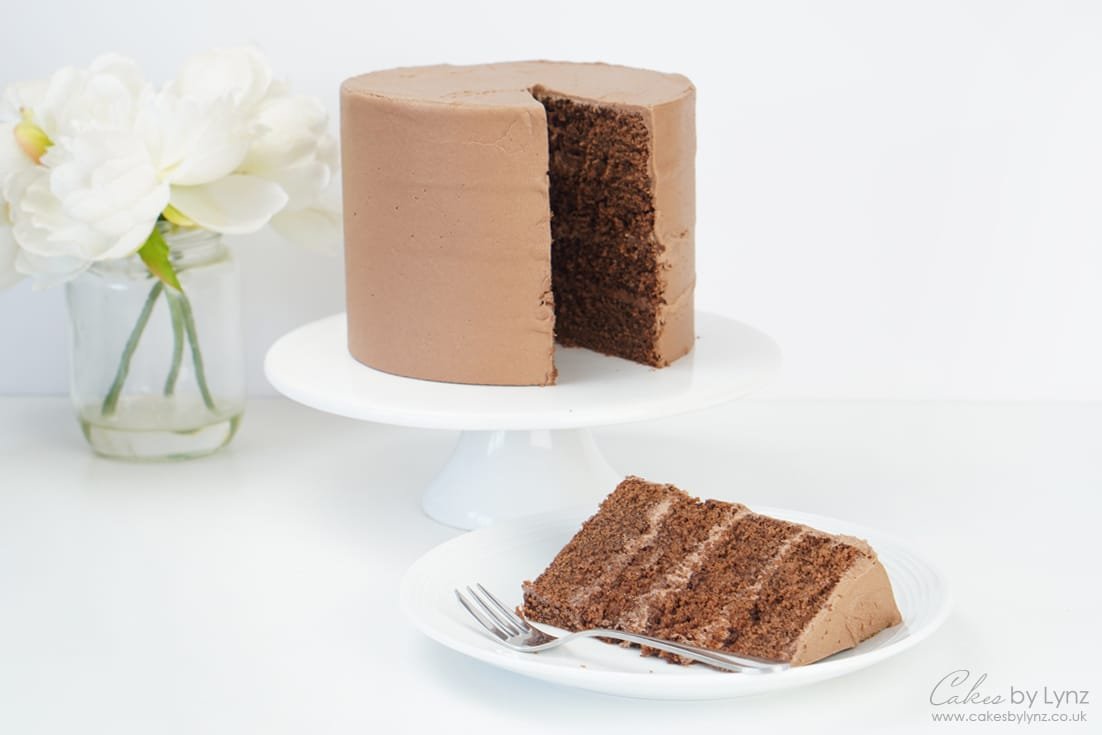
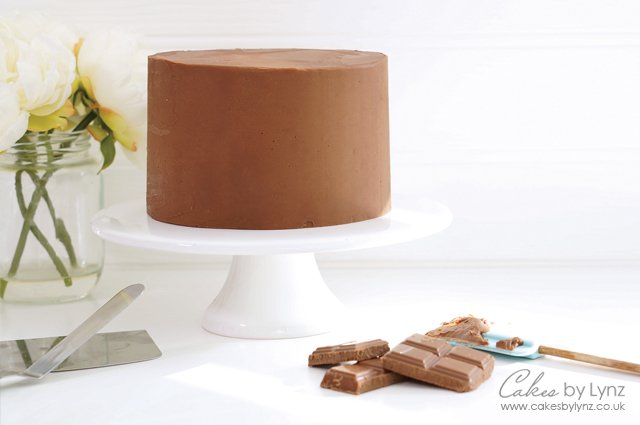
- I love to decorate my cakes using American Buttercream or chocolate ganache. You’ll find the full recipe below.
Cake mixture consistency
If when making your mixture you find it a little thicker than mine, this could be down to your eggs being a little smaller or even the temperature. If your mixture is a little thicker it could be that the butter is just a little colder. You always want your ingredients at room temperature.
One thing I like to do if my mixture is a little stiff is add a little dash of milk to thin out the mixture. This will also add extra moisture into your cake. You want your mixture to fall off your spatula, but not be too runny.
Recipe substitutions
Changing the flavour
Once baked you get this nice fluffy sponge cake which is full of flavour, and I think totally yummy!! If you fancy something other than vanilla cake you can substitute this for another flavour of your choice.
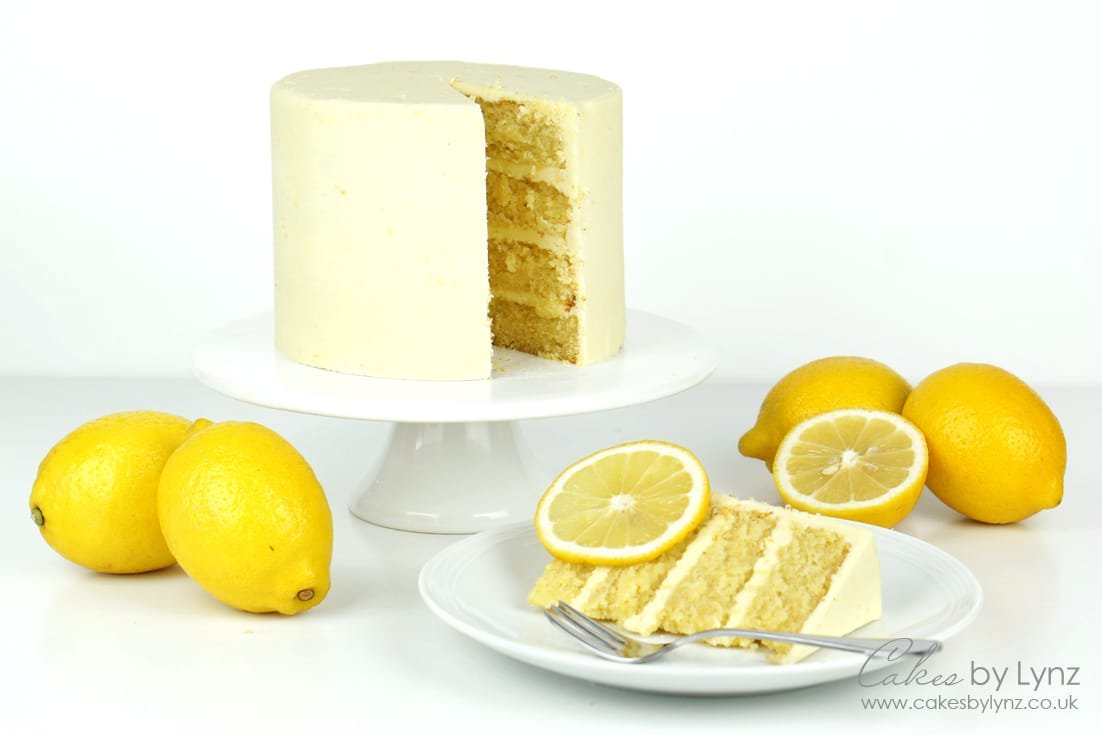
Some of my favourites are adding orange flavouring and combining this with a chocolate buttercream, or a lemon cake with lemon buttercream. In this recipe I use vanilla essence to flavour the cake, but you can substitute this for any flavouring and the recipe will still work perfectly. You get the same fluffy light texture, but with so many flavour possibilities.
Self Raising Flour
One question I get asked a lot is “why is there no baking powder in this recipe?”. The answer is because I’m using self raising flour. Self raising flour already has the raising agent (baking powder) added. In the UK self raising flour is extremely common in all supermarkets, but I realise it can be hard to get in some places around the world. If self raising flour isn’t available to you, just add 1tsp baking powder for every 100g of plain flour.

Vanilla Sponge Cake Recipe
Ingredients
Ingredients the Cake
- 12 oz Self Raising Flour (340g)
- 12 oz Room Temperature Butter or Baking Spread (340g)
- 12 oz Caster Sugar (340g)
- 4 eggs
- 2 tbsp Vanilla Essence / Flavouring
For the Buttercream
- 18 oz Icing Sugar (500g)
- 9 oz Block of Salted Butter (250g)
- 1 tbsp Vanilla Essence / Flavouring
- 2.5 tbsp Milk
Instructions
- Place all of the ingredients for your cake together in your mixing bowl.
- Mix these together until the ingredients are fully combined. This usually takes around 30 seconds.
- Divide your mixture between 2 x 6 inch cake tins. I like to cover the inside of my tins in a thin layer of butter and dust with flour, before adding a circle of parchment to the bottom to stop the mixture from sticking.
- You then want to bake your cakes for around 45 minutes on the middle shelf at 180 degrees Celsius. For my oven I use a normal oven setting. I don't actually use my fan oven when baking cakes as it tends to bake the cakes quicker on the outside so you get this hard crusty shell and the mixture is not baked all the way through.
- After 45 minutes you can take a cocktail stick or bamboo skewer and push this into the center of the cake. If it comes out clean you know your cake is baked all the way through. You can then place your tins of a wire rack to let cool for a few minutes before turning them out, and allowing to fully cool.
- Whilst the cake is cooling you will need to sift your icing sugar into your mixing bowl. To this add the butter, flavouring, and milk.
- Then mix your buttercream on a medium speed. After around 5 minutes your buttercream will start to go creamy. You can then add any gel colouring depending on the theme of your cake.
- Once your cake has cooled you can level off the top and divide each layer into 2. Placing your buttercream between your layers, stack your cake.
- You then want to add a thin crumb coat of buttercream around the edge of your cake to lock in any loose crumbs. Place your cake into the fridge for around 30 minutes to allow the buttercream to firm up.
- You can then go in with the rest of your buttercream, adding a nice finish around the side of your cakes. This is then ready for any final decorations.
I really hope you enjoy this recipe and find it helpful in your own baking kitchen. If you bake this cake, don’t forget to tag me @CakesByLynz on Instagram so I can see your beautiful creations!
For more free cake decorating video tutorials, make sure to subscribe to my YouTube channel and pin this tutorial to your Pinterest baking boards for later.


Leave a Reply