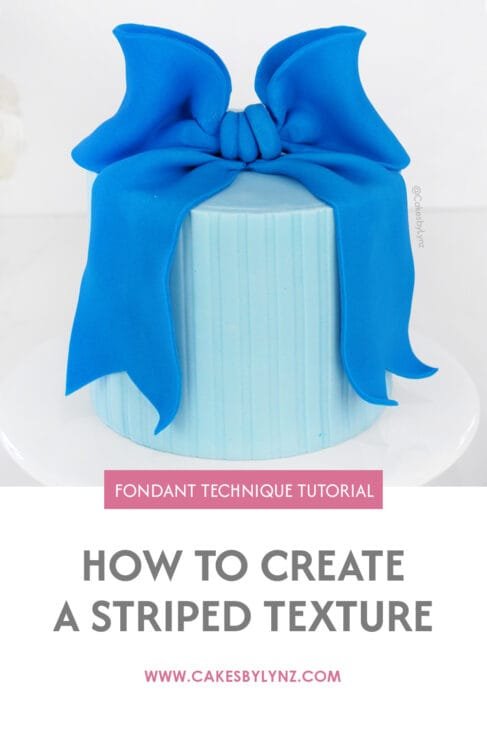
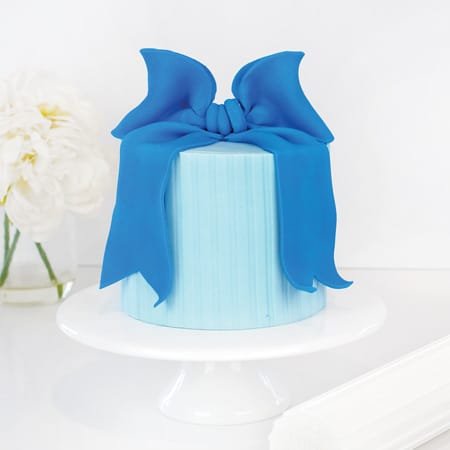
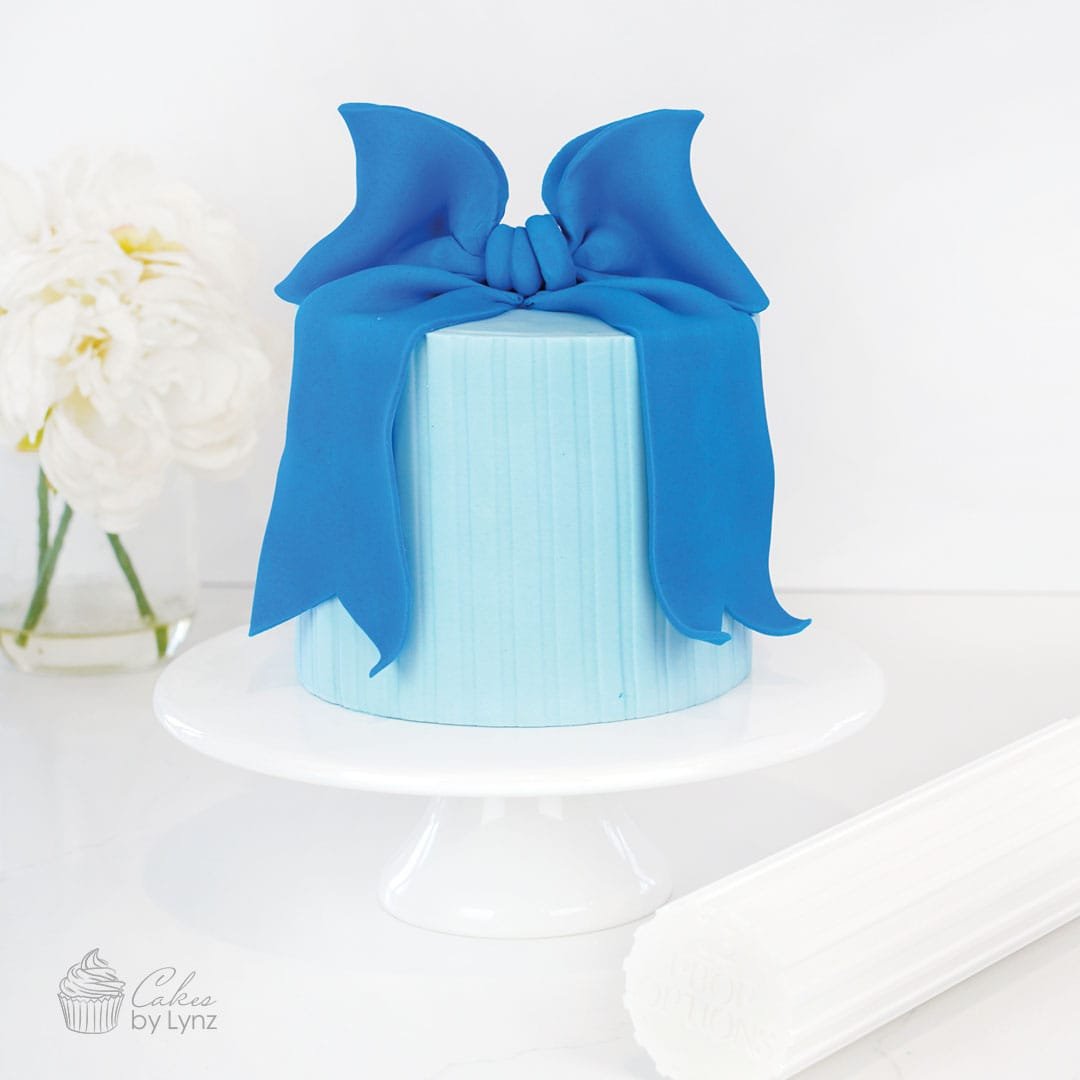
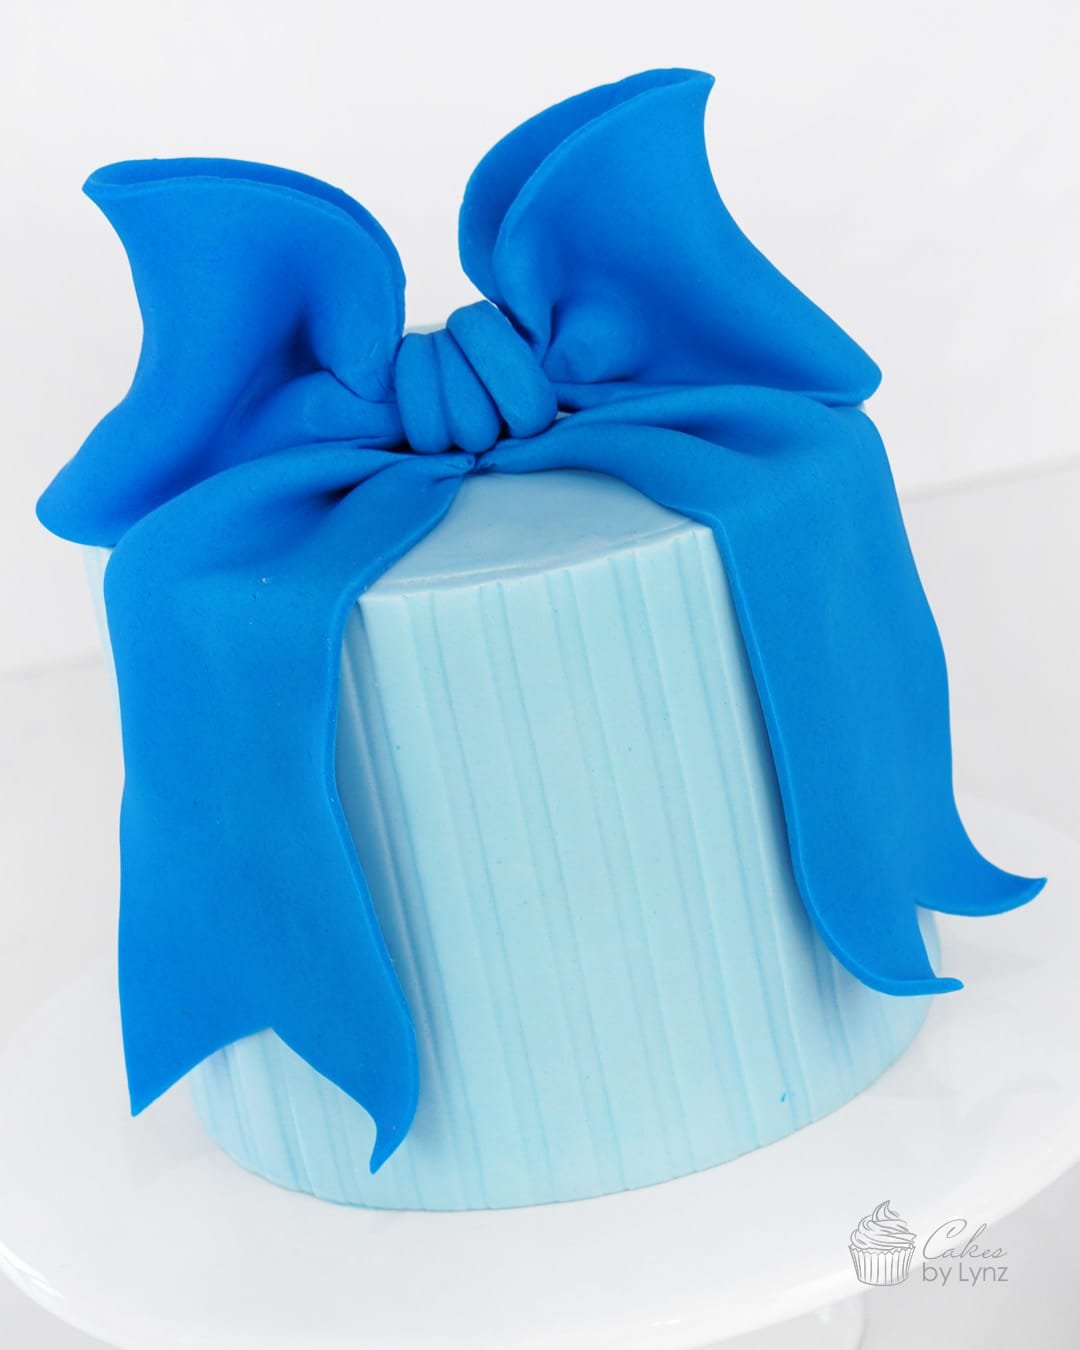
A few weeks ago you may have seen that I posted a tutorial showing how to make a cute fondant teddy bear cake topper. I’m so excited to share with you how I made the cake that the teddy bear was sitting on. This cake has pretty stripes, which were created with a textured rolling pin, and a cute bow on the top.
If you haven’t yet tried textured rolling pins, I wanted to show you how easy it was to create an amazing effect around the side of your cakes. Below you’ll find a video tutorial to guide you though all the steps of making this cake, along with how to make the cute fondant bow on top.
Watch how to create stripes using a textured rolling pin
Below you’ll find the full step by step video tutorial to guide you through how to use a textured rolling pin and how to apply the fondant onto your cake. I then show you how to create the cute fondant bow for the top.
You can also scroll down for a look at how easy textured rolling pins are to use.
Prop Options textured rolling pin
The rolling pin I’m using is one of the textured rolling pins from Prop Options. They have so many designs, but this is their No 13 ‘Panel’ rolling pin. It is 9 inches in height, and I covered my cake using the panelling method, which meant it was plenty wide enough for my 5 inch high cake.
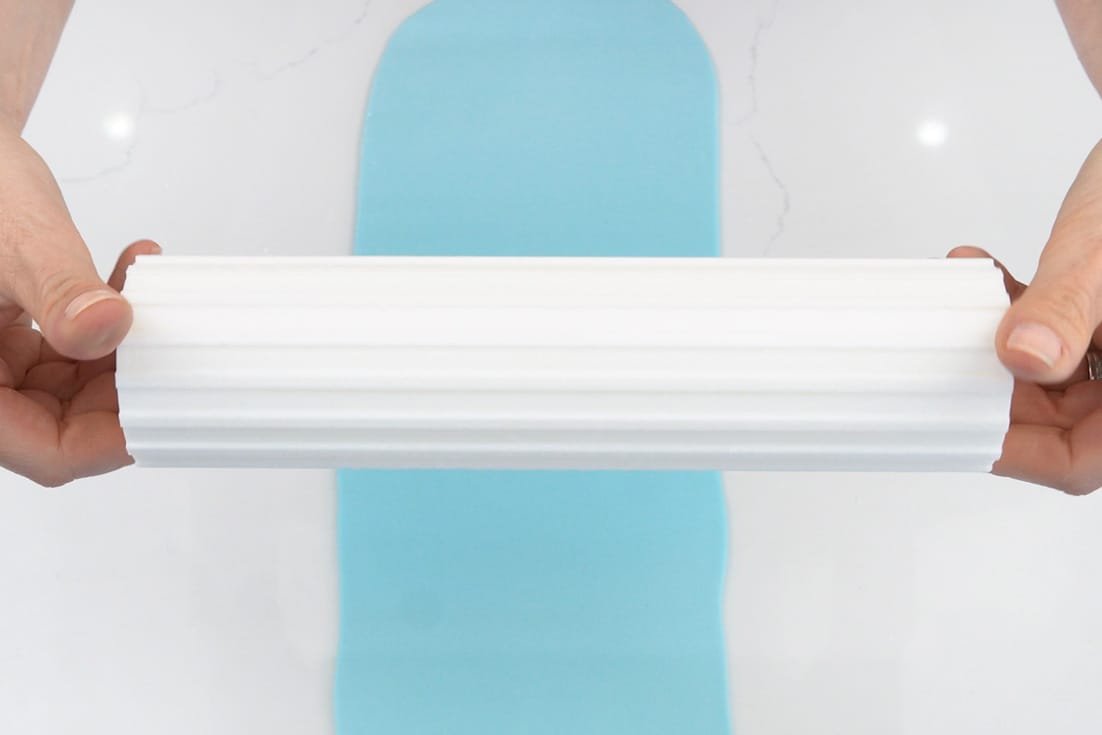
It is extremely lightweight and to me looks as though it has been 3D printed in a nice white plastic. I found it really easy to push into my fondant. I would say that a fondant that is soft enough to push the design into but firm enough to lift and handle is perfect to use with this rolling pin. For this cake I was using the Pasta Cover fondant from Saracino.
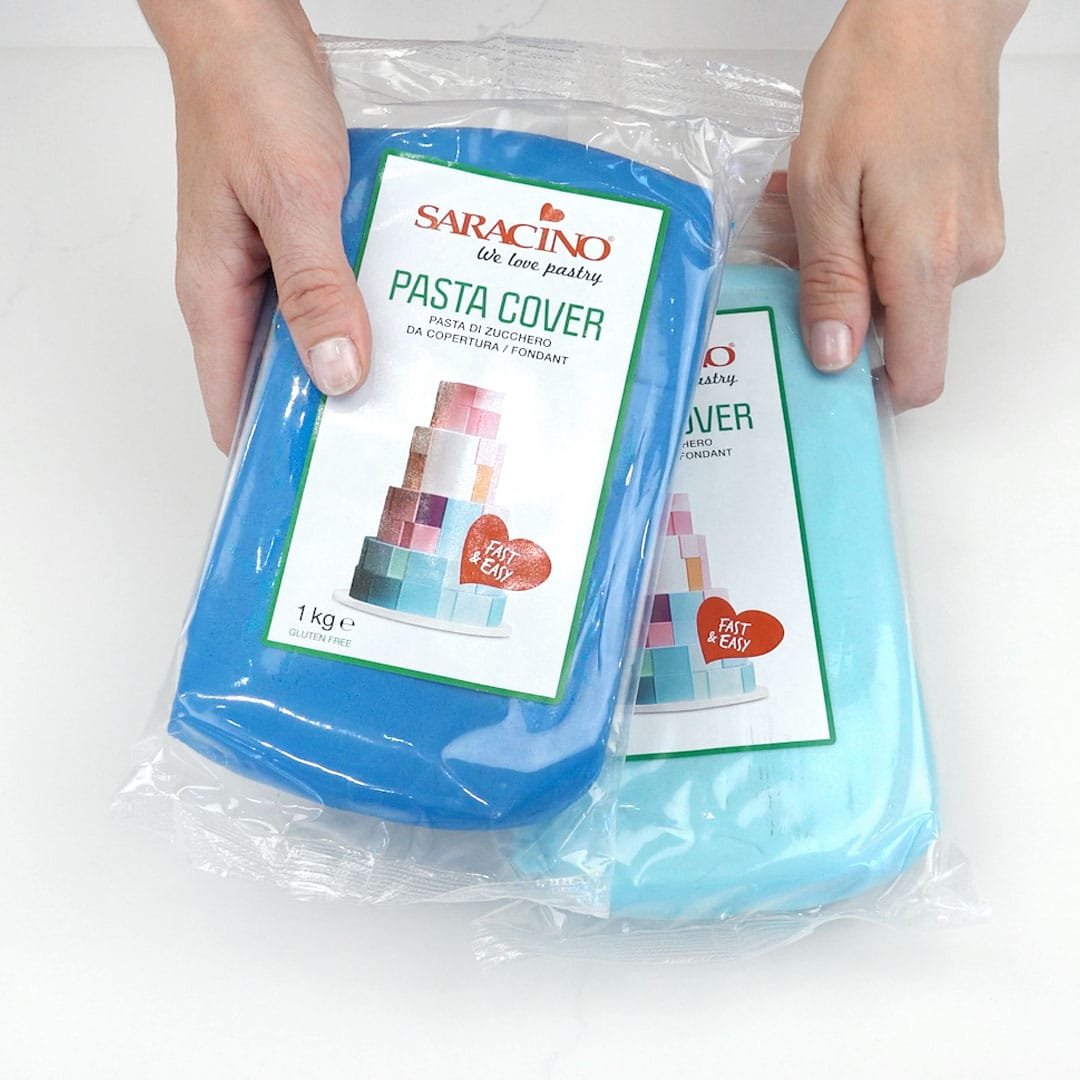
Using the Saracino Pasta Cover Fondant
I’m new to using the Saracino Pasta Cover, but I think I have found a new favourite fondant for all my cakes. This fondant was perfect for this cake. It is soft enough in the packet to easily break off the amount you need. It also takes minimal effort to soften the fondant. I just kneaded it for a few minutes with the palm of my hand to make it a little more pliable.
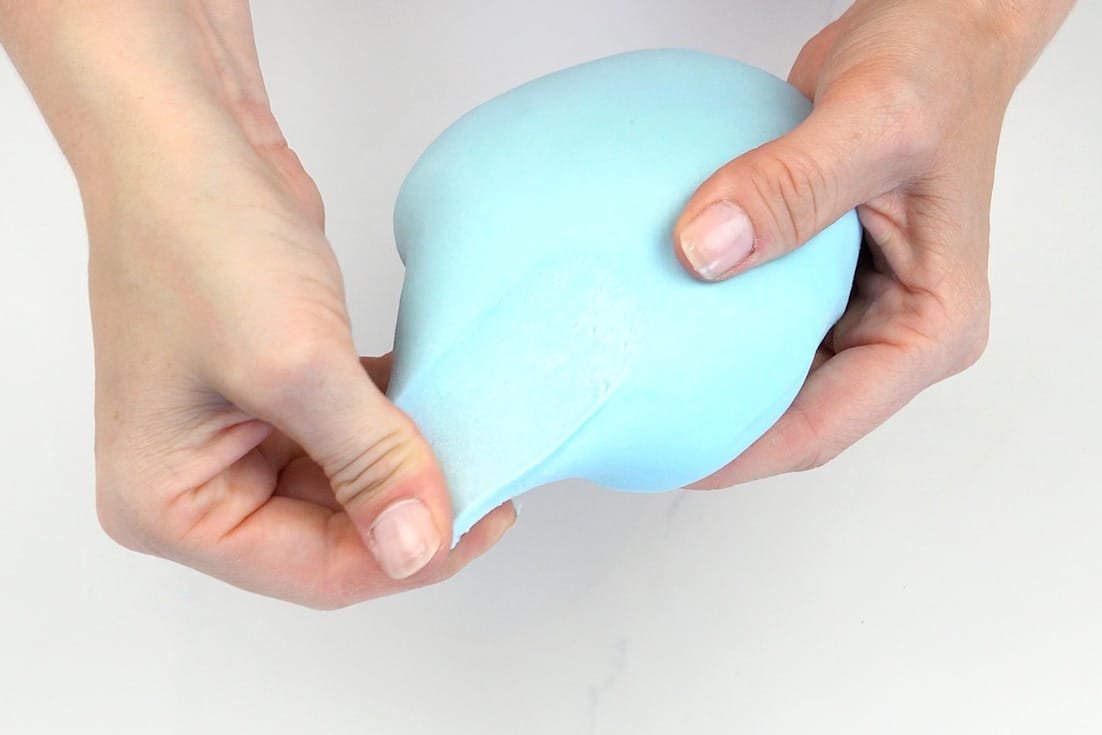
The fondant is soft, but also has some elasticity to it, which made it easy to roll the pattern into. It is also firm enough that I could pick it up and move it onto the cake.
- Saracino Pasta Cover White – Use code CAKESBYLYNZ10 for 10% off
- Saracino Pasta Cover Colours – Use code CAKESBYLYNZ10 for 10% off
How to use a textured rolling pin
You first want to prepare your cake for fondant. I covered my cake in ganache and started by adding a circle of fondant onto the top of my cake as you will need to use the panelling method to add your fondant around the side.
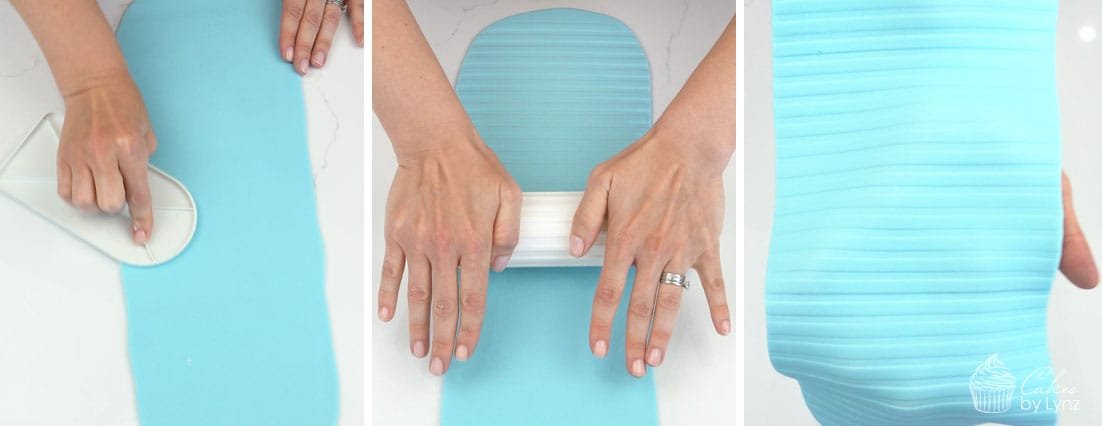
- Step 1: Roll out a fondant panel large enough to wrap around the side of your cake. You want to make this a little thicker than normal as we will be pushing the rolling pin in to create the design. This will cause it to get a little thinner.
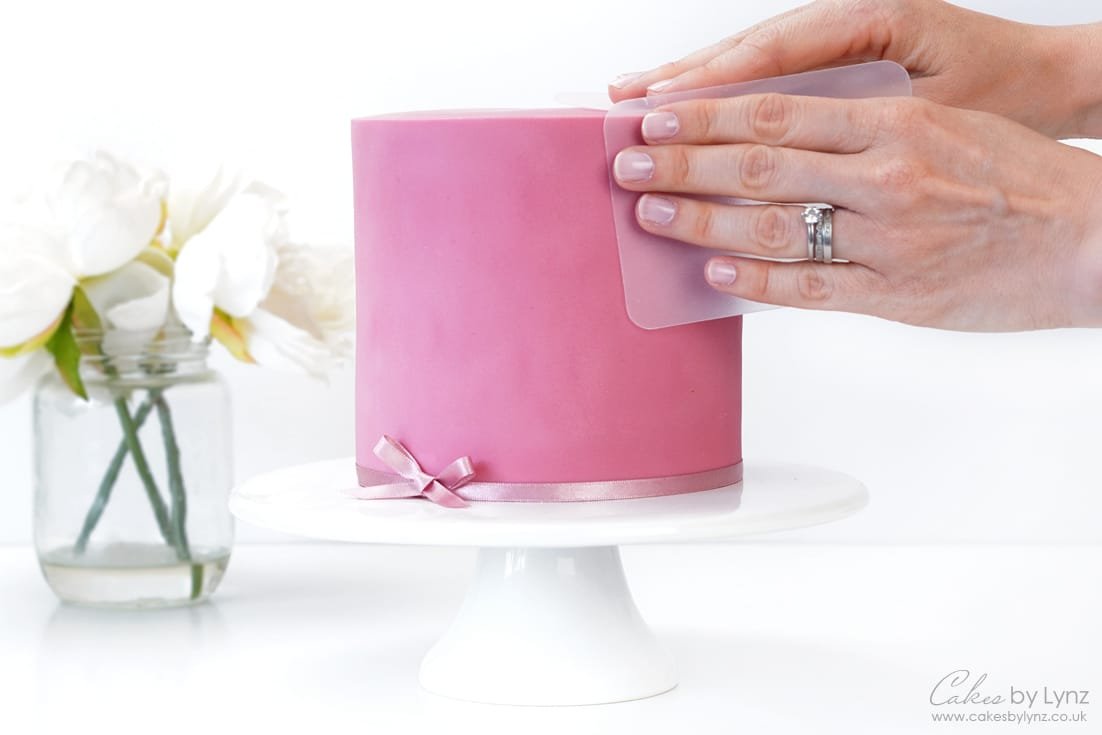
- Step 2: Before going in with my textured rolling pin I like to run over the fondant with my paddle smoother. Smoothing it out and getting rid of any air bubbles.
- Step 3: Place your rolling pin onto the end of your fondant and with an even pressure push along the fondant. If you need to stop at anytime, just allow the rolling pin to slot back into one of the grooves you have already made before continuing.
- Step 4: Once you have your texture you can then cut this down to fit your cake. Lightly rolling it up ready to apply around the side of your cake. Take a look at the video tutorial above for a detailed look at how to apply fondant using the panelling method.
Tools I used for the Cake
- Prop Options Panel (no 13) Rolling Pin
- Saracino Pasta Cover – Use code CAKESBYLYNZ10 for 10% off
- Modelling tools
- Prop Options Work Board – Use code CAKESBYLYNZ for 10% off
- Turn Table
~ Please note that some of the links above are affiliate links. If you click the link and purchase any item through that link, I will receive a small commission from the website but this does NOT add any additional costs to you. Thank you so much for supporting this blog x ~
The Prop Option rolling pins make adding texture around the side of your cake so easy. I love how this cake turned out and think this would look so pretty as a birthday or baby shower cake.
In the full step by step video I also show you how to make this cute bow for the top of the cake. I always think bows are the perfect addition to any cake as they look so pretty.
If you would like to see more cake techniques and you haven’t already you can also subscribe to my YouTube channel for more FREE cake decorating tutorials.
Plus why not save this tutorial for later and pin it to Pinterest